Hanger 9 Funtana X50 Electric Conversion Page
1
By Chris Brew |

|
With the steady increase of electric models appearing at
flying sites all around the wor ld, it has been on my mind for
. ld, it has been on my mind for
.
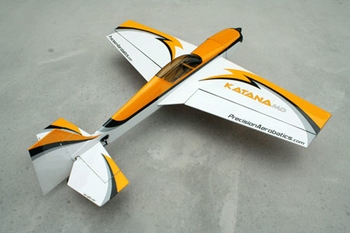
sometime to join in the ranks and give it a go. Many an hour has been spent surfing the net checking out all of the options available, my favorite without a doubt being Precision Aerobatics Katana
MD. With progress being
made on my Fokker Eindecker EIII and not wishing to spend copious quantities of money
on a new electric plane at this point in time, it just remained a thought, a thought niggling in
the back of my mind on a regular basis.
Back in October 2008 while flying my Pulse at Geoff's, it
became very obvious to me that there was a problem with the
OS46ax that was powering it, so a decision was made to strip
the engine and inspect it for the problem. It soon became apparent
that there was a problem with the liner and piston. As I had the
same engine powering my Funtana and knowing that the Funtana could really
do with more power, the engine was pulled and fitted into the Pulse.
The idea was to fit the Funtana with a Saito82fs, but due to the bad
dollar and the hefty increase in the price of the Saito the idea was
shelved and I got back to the Eindecker.
Some time passed and with the electric thing still niggling
away and the dollar still not looking good for the Saito it suddenly
occurred to me that I had the ideal model for the conversion
gathering dust on its shelf at the back of my workshop. Back on the
net, this time researching the conversion, I came across a guy on a
forum in the UK that had done a similar conversion on his Funtana.
The search begun looking for the needed parts to complete a
similar conversion to my Funtana. A list of available parts was put
together and emailed to our resident electric expert Tony.
With an encouraging nod from Tony the order was put in and a couple
of weeks later I had the parts in my hand. The set up I choose is as
follows:
Turnigy 50-65C 320kv Outrunner
Turnigy Plush 80A w/ UBEC Speed Controller
Two Turnigy 5000mAh 3S 20C Lipo Packs in series for 22.2 volts
TGS Sport 17x10E Precision propeller
The conversion itself was really quite strait
forward. After removing the original glow engine mount, fuel tank,
throttle servo and linkage, there was plenty of room in the forward
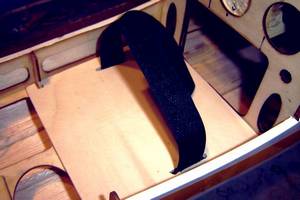
part of the fuselage to fit the battery packs so a battery tray was
constructed from light ply and fitted in place. The installation of
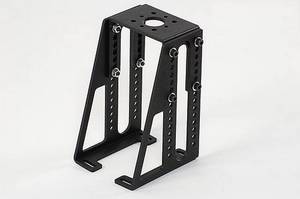
the motor was made easy with the use of HXT
Alloy Composite Firewall Mount, from Hobby King. Two of the original
blind nuts were fitted in the correct place so only two of them had
to be repositioned, there new positions were marked and new holes
drilled. Unfortunately due to an internal brace on the firewall one
of the blind nuts could not be used. To get around this problem I
glued in a block of spruce and replaced the original bolt with a
screw. The positioning of the motor within the cowl was made
easy by the vast array of adjustment obtainable with the alloy
mount.
 
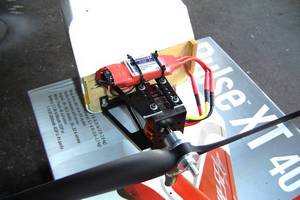
Next came the mounting of the speed controller,
this also was straight forward, after a trial fit to check for
the length and position of the wiring to the engine phase wires,
trimming them to length and soldering on the gold connectors the
speed controller was secured to the bottom of the engine mount
with a couple of zip ties and the wires were run to the engine
and also to the receiver


|